

How to install the 25mm diameter DUNE blind
In this blog article, we will show you how to install the 25mm diameter blinds from Ansar Deco, including the modern Dune design. Grab your tools and let's get started!
How to Install the Dune Model
Before you begin, make sure you have chosen the perfect size for your window. If you're unsure, we recommend reading our blog: How to Measure the Window?
6 easy steps to make it simple to decide which blind you like best
- Measure the blind with the mechanisms in place and find its midpoint.
- Measure the window, find the midpoint, and measure the distance from the blind's center to place the first bracket.
- Place the blind resting on this first bracket and trace the outline of the opposite mechanism to position the screws. Ensure it is well leveled.
- Hook the blind onto the brackets, starting from the chain side.
- Insert the counterweight.
- Unroll the blind and make sure it functions perfectly. Tips:
-
If you find it difficult to raise or lower the blind, it's likely too tight. You need to move one of the brackets outward to provide more space for the mechanism.
-
If it doesn't raise completely level, completely unroll the blind and raise it again. If it still goes up with a slight tilt, unroll the blind again and attach a piece of masking tape to the tube, on the side where the fabric moves. Roll it back up. Continue adding or removing masking tape until the fabric is perfectly level.
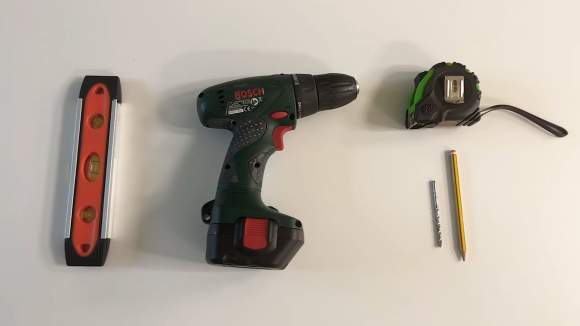
Tools:
- Pencil
- Ruler/measuring tape
- Level
- Drill/Drill bit (M6)
- Phillips screwdriver.
Let's get started!
Step 1: Measure the blind.
Remove the blind from the packaging. Carefully remove the staples to avoid damaging the fabric. Check that you have all the pieces and that the mechanisms fit the diameter of the blind's tube, and these, in turn, fit the brackets.
The mechanisms can be installed interchangeably, meaning the chain control can be placed on either the right or left side. However, the brackets are specific to each side, so take note of this detail to avoid mounting them upside down.
Before installing, you'll need to measure the entire blind, including the mechanisms. This way, you can mark its midpoint.

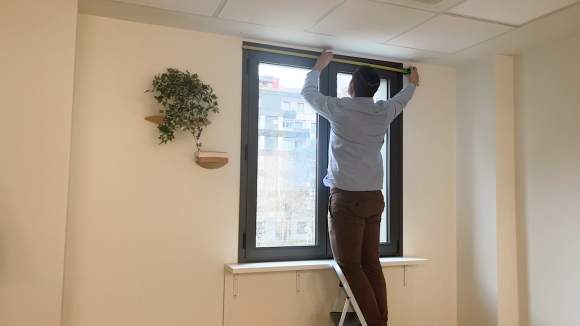
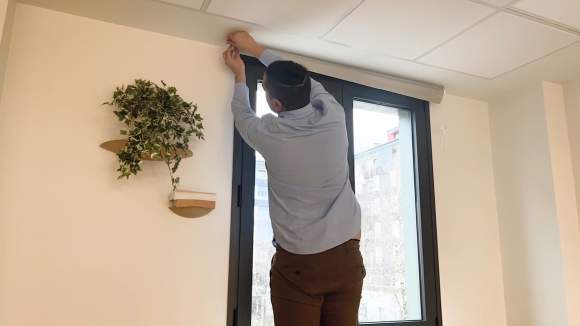
Step 2: Measure the window and place the first bracket.
Measure the width of the window and mark the center, either on the ceiling or the wall. Next, leave 10cm on each side to mark the position of the mechanism.
If you're mounting it on the ceiling, leave a minimum distance of 1.5cm from the top, to prevent the blind from hitting the window handle.
To install it correctly, we'll first secure the bracket on one of the ends, using the blind as a template.
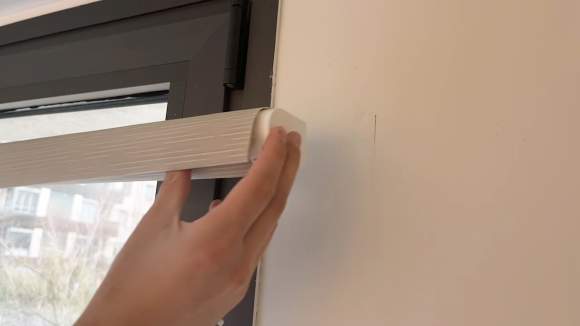
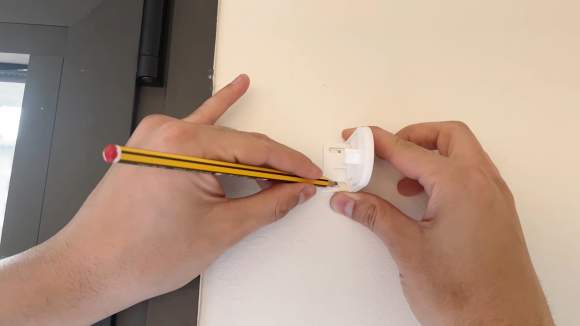
Place the mechanisms on the blind, center it with the window, and rest the brackets. Mark the wall with a pencil on the side and bottom of the white mechanism.
Remove the blind and place the mechanism over the marks. Draw the four holes of the brackets on the wall with a pencil and proceed to drill holes where you've marked. Insert the wall plug, and screw the mechanism to the wall.
Tip: When marking the fixing points, create a cross; it will make it easier to work with the drill.
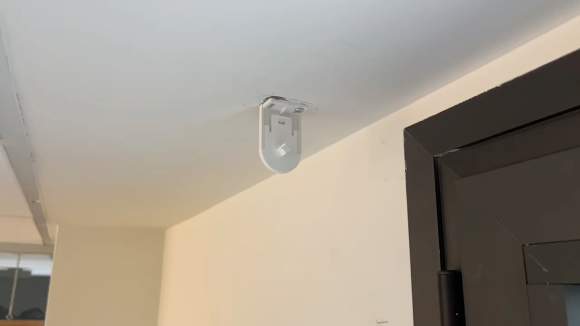
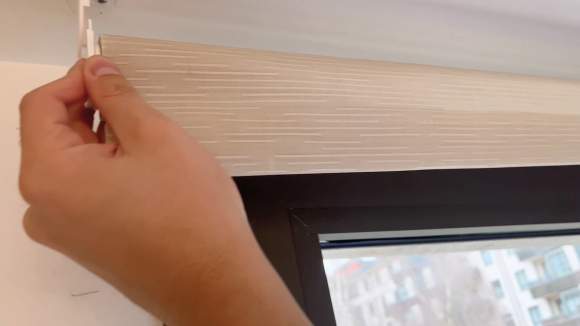
Step 3: Place the bracket on the opposite side.
Reassemble the blind and position it again. This time, use the pencil to mark the side of the opposite end. Use a level before drawing the sides to ensure the blind is perfectly level.
Take a drill, attach the drill bit and the depth stop (so you don't drill too far), and in a perpendicular position, make holes over the crosses you just created. Next, insert the wall plugs into the holes and, with the help of a padded hammer or the handle of a screwdriver, tap them in until they are flush with the wall. Now, all that's left is to screw in the bracket and repeat the process with the other side. The screws are size 6.
Tip: Place an envelope just below the crosses; this way, while you're drilling, it will catch the dust and prevent any mess.
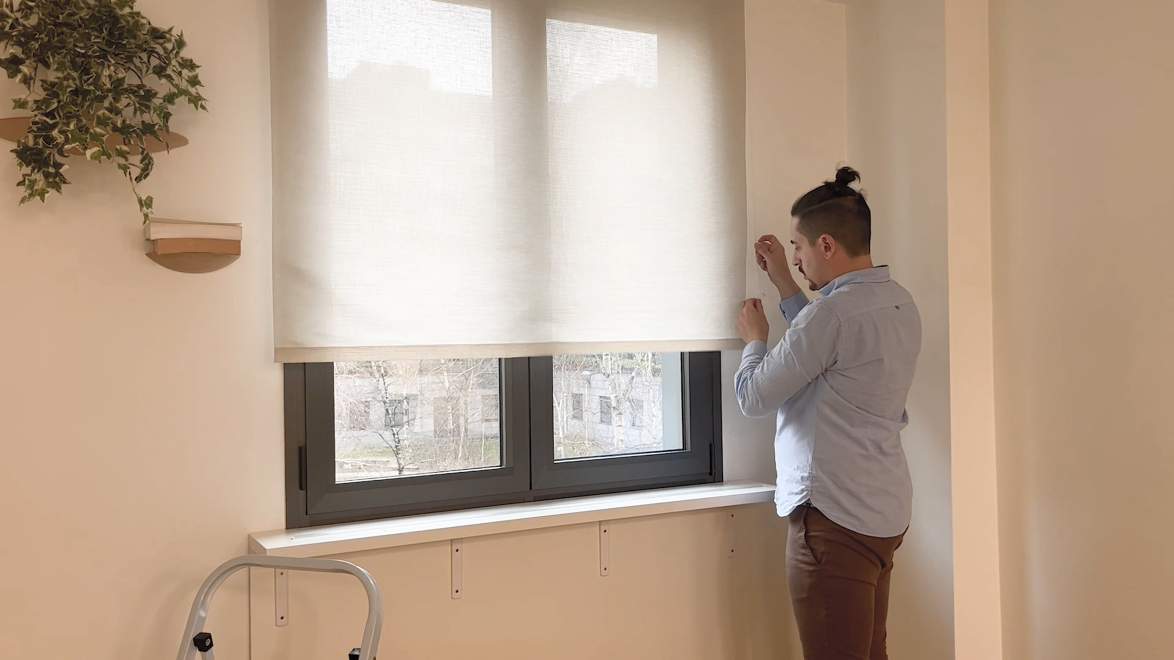
Step 4: Time to Install the Blind!
Once the brackets are installed, we proceed to install the blind. We will always start by placing the blind using the chain control.
Remove the plastic clips from the brackets by lifting the plate. Place the clip inside the mechanism and slide it onto the bracket until you hear a "click."
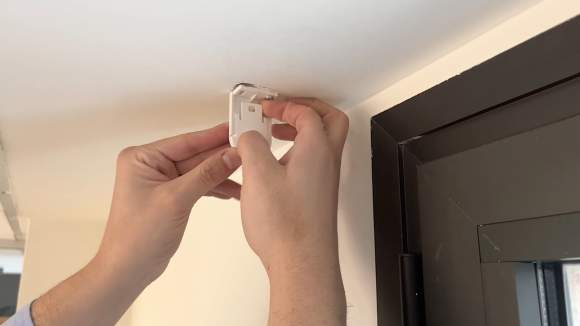
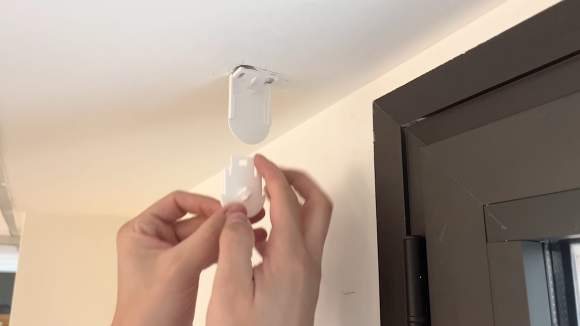
Remove the plastic clips from the brackets by lifting the plate. Place the clip inside the mechanism and slide it onto the bracket until you hear a "click."

Step 5: Final Checks
Finally, we will ensure that the blind operates correctly by unrolling it. If the blind is difficult to lower, it indicates that the brackets are exerting too much pressure. Remove the blind and gently push one of the metal plates outward. Reassemble the blind and test its functionality.
And there you have it! You can now enjoy your blind.
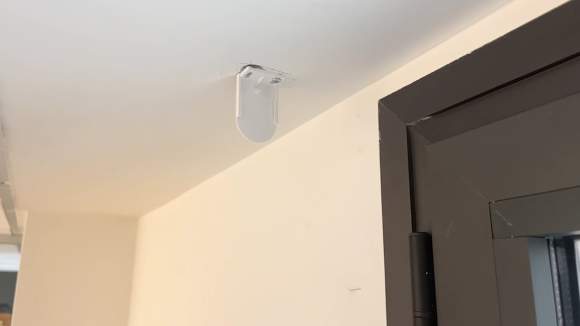
Step 6: Safety First
On the chain side, you'll find a transparent safety device. From Ansar Deco, we recommend attaching it to the wall. This way, the chain will be under tension, preventing any strangulation hazards.
To do this, extend the tensioner, mark the screw positions with a pencil, drill the holes, and secure the tensioner with the screws. Finally, reattach the chain to the tensioner.
Video tutorial on how to install the blind:
That wraps up today's article. If, after reading this, you still believe you're not capable of installing a blind (deep down, you know you can), when purchasing our blinds at Leroy Merlin, you can request the installation service and forget about the matter, simply enjoying your home.